
How to Fit a Concealed Shower?
A concealed shower creates a clean, modern wall finish because the main valve body and pipework sit inside the wall, while only the trim parts stay visible. Fitting one correctly requires careful planning, accurate depth setting, and a proper pressure test before closing the wall. If you are specifying concealed systems for residential bathrooms, hotel projects, or renovation packages, selecting a stable mixer structure and consistent manufacturing quality reduces installation risk and long-term callbacks.
This guide explains a practical fitting process and the key technical checks. For product sourcing and project matching, you can view DELICA’s concealed shower mixer options here: Concealed Shower Mixer.
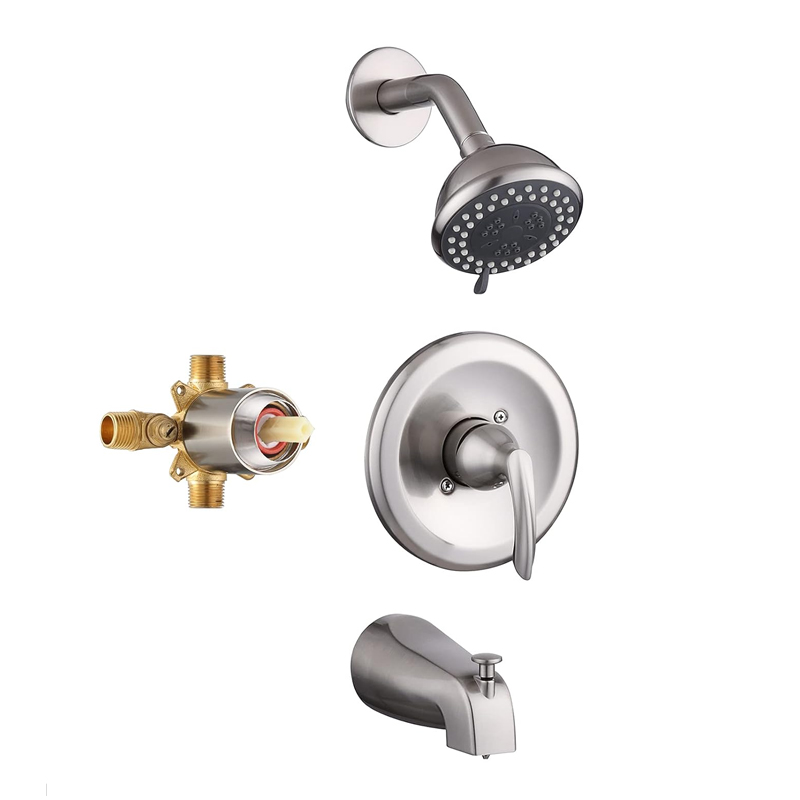
Understand the concealed shower layout before cutting the wall
A concealed shower is not installed like an exposed bar mixer. The valve body must be positioned at the correct height and depth, and each outlet line must be planned based on the shower functions.
Common concealed shower configurations include:
Single outlet: handheld shower or overhead shower
Dual outlet: overhead shower plus handheld shower
Multi outlet: overhead shower, handheld shower, body jets, or tub spout
Even when the visible trim looks similar, the internal routing changes based on how many outlets you need. Confirm the planned functions early so the rough-in valve and diverter design match the final bathroom layout.
Tools and materials typically required
You do not need specialty tools, but accuracy matters. Many installation issues come from wall depth mistakes or misaligned pipework.
Measuring and marking
Tape measure, marker, spirit level, and a straight edge for aligning the valve and outlet points.Pipe connection tools
Appropriate pipe cutters and jointing tools depending on local pipe type. Use the correct sealing method for your system, and keep sealant away from waterways.Fixing and wall preparation
Wall chaser or suitable cutting tools, drill and anchors, plus backing support material if the wall is not solid enough to hold the valve body firmly.Test equipment
A way to pressure test and flush the line before final trim installation.
Step-by-step fitting process
1. Plan the mounting height and user comfort
The best height depends on the project and user group.
Valve handle height
Many installers place the control handle where it is easy to reach without bending. For mixed-use bathrooms and hotel projects, a mid-level position improves accessibility.Overhead shower height
Set the overhead outlet high enough for comfortable standing clearance. If the shower ceiling height is limited, use an arm length that centers the spray over the standing zone.Handheld shower position
Mount the outlet and bracket for easy reach, ensuring the hose does not kink when stored.
Take time here because once the wall is closed, adjusting heights becomes expensive.
2. Prepare the wall cavity and support structure
A concealed valve needs solid fixing to prevent movement when the handle is operated.
Create enough space for the valve body and connections
Do not oversize the cavity without planning how to support the mixer. If the wall is lightweight, install a rigid backing board or a support frame.Keep pipework neat and serviceable
Avoid tight bends that create flow restrictions or stress points. Keep the valve accessible through the trim opening once installed.Maintain clearances
Leave room for the cartridge, diverter, and trim plate alignment. A cramped cavity makes it harder to set correct depth.
3. Set the correct installation depth
Depth control is one of the most important steps for concealed shower success.
Align the valve with the final finished wall surface
Your finished wall thickness includes tile, adhesive, waterproof layers, and backer board. The valve body must be set so the trim plate sits flush after tiling and the handle rotates freely.Avoid two common depth errors
Too deep: the handle may not engage properly or the trim plate may not seal against the wall
Too shallow: the trim may protrude and look unfinished, or interfere with handle movement
If you are supplying mixers for projects, consistent dimension control helps installers achieve correct depth without repeated trial fitting. DELICA’s product focus includes providing concealed shower mixers suitable for project installation and stable supply: Concealed Shower Mixer.
4. Connect hot and cold inlets correctly
Most concealed mixers require correct hot/cold orientation.
Identify hot and cold sides before connecting
Follow the marking on the valve body. Reversed connections can cause temperature control issues and may require reopening the wall to correct.Use proper isolation strategy where possible
In many projects, isolation valves are used upstream so future maintenance can be done with less disruption.Keep debris out of the valve
During rough-in, construction debris is common. Protect open pipe ends and avoid letting dust enter the valve body.
5. Connect the outlets and diverter lines
If you have more than one function, outlet routing must match the diverter layout.
Confirm the outlet order
For example, overhead versus handheld. If they are swapped, the user experience becomes confusing, and correcting it later often requires rework.Match pipe sizing to expected flow
Long runs or multiple outlets may require proper pipe sizing to maintain performance. Under-sized lines can cause weak spray and customer complaints.Use a straight, supported route
Support pipes and avoid vibration. Movement inside the wall can cause noise and long-term stress on joints.
6. Pressure test, flush, and check for leaks before closing the wall
This step prevents the most expensive mistake: sealing the wall with a hidden leak.
Pressure test the system
Bring the system to normal operating pressure and hold it for a suitable period. Look for drops in pressure and inspect every joint.Flush the lines
Flush hot and cold lines to remove debris before the cartridge and trim are installed. Debris can damage seals and cause dripping early in service life.Inspect the wall cavity
Check for moisture signs, confirm the valve is solid, and ensure no pipe is rubbing against sharp edges.
Only after a stable test should you proceed with waterproofing and tiling.
7. Install waterproofing and finish the wall
Waterproofing quality is part of concealed shower reliability.
Seal penetrations properly
Outlets, elbows, and trim openings must be sealed to reduce water ingress behind the tile.Ensure the trim plate sits flat
An uneven wall surface can leave gaps. Correct surface preparation improves final appearance and prevents water tracking behind trim.
8. Fit the trim kit and final components
After the wall finish is complete, install the visible parts.
Install the escutcheon and handle
Make sure the handle rotates smoothly without scraping. Check that the trim seals against the wall.Install shower head, arm, handheld hose, and bracket
Use correct thread sealing and avoid over-tightening which can damage threads or distort seals.Calibrate temperature control if required
Some mixers require temperature limit setting for safety and compliance, especially in hotel and rental projects.
Typical installation checks that prevent callbacks
Temperature stability check
Run hot and cold transitions and confirm the handle response feels predictable.Flow performance check
Test each outlet individually and verify the diverter changes function cleanly.Leak check under real use
Run the shower for several minutes, then inspect around trim and wall edges for any seepage.Noise and vibration check
Listen for rattling or vibration when water is running. Proper pipe support reduces this issue.
Common problems and practical fixes
Handle feels stiff after installation
This can be caused by debris in the cartridge or misalignment due to incorrect depth. Flushing and correct depth positioning are the primary solutions.Water leaks behind the trim plate
Often caused by missing seals, uneven wall surface, or poor waterproofing around penetrations. Correct sealing and wall preparation help avoid this.Weak overhead spray
Common causes include undersized pipework, long runs, clogged aeration points, or incorrect outlet routing. Confirm line sizing and flush the system thoroughly.Diverter does not switch cleanly
This can happen if the outlet lines are swapped or if debris enters the diverter. Proper routing and clean installation practices reduce the risk.
Specification table for project planning
| Item to Confirm | Why It Matters | What to Record for Your Project |
|---|---|---|
| Finished wall thickness | Determines valve depth and trim fit | Tile thickness, adhesive, backer board total |
| Outlet configuration | Defines routing and diverter needs | Overhead, handheld, body jets, tub spout |
| Mounting height | Affects comfort and accessibility | Handle height, overhead height, handheld height |
| Pipe type and sizing | Impacts flow and stability | Material type, diameter, run length |
| Testing process | Prevents hidden leaks | Pressure test method and holding time |
| Maintenance approach | Reduces future disruption | Isolation valves, access strategy, spare parts |
Why many buyers choose DELICA for concealed shower projects
Concealed systems demand accuracy in internal structure and consistent manufacturing because installers rely on stable dimensions and dependable performance.
Product range built for practical installation needs
DELICA offers concealed shower mixer options suitable for common bathroom layouts and project-based purchasing, helping you match the right configuration to the right job.Consistent production supports repeat orders
For distributors and contractors, consistent product specification across batches reduces field adjustment and simplifies inventory planning.Support for project sourcing
If you supply hotels or contract projects, a stable supplier with clear product positioning helps reduce procurement risk and supports long-term cooperation.
Explore DELICA concealed shower mixer options here: Concealed Shower Mixer.
Conclusion
To fit a concealed shower correctly, focus on three priorities: correct valve depth, clean and accurate pipe routing, and full pressure testing before the wall is closed. When these steps are controlled, concealed showers deliver a clean finished look and reliable long-term use. For project sourcing, selecting a consistent concealed shower mixer range helps installers work faster, reduces rework, and improves end-user satisfaction.
Previous: